A great night of stargazing depends on more than owning a telescope. You could have excellent equipment, but if you set it up beside bright streetlights under a cloudy sky, you will probably see very little.
The best stargazing location is usually somewhere dark, safe, accessible, and open enough to provide a wide view of the sky. Weather conditions, the Moon’s brightness, nearby towns, trees, mountains, and even the direction you face can affect what becomes visible.
A location that works well for observing the Moon may not be suitable for finding the Milky Way or watching a faint observing the Moon may not be suitable for meteor shower.
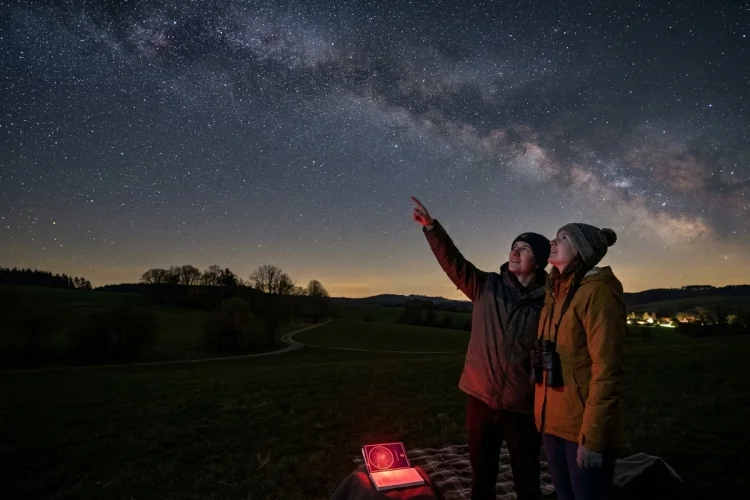
Fortunately, you do not always need to travel to a remote desert or mountain. A quiet beach, rural field, public park, or dark corner of your own garden may offer a satisfying view.
This guide explains how to compare possible observing sites, use light-pollution maps, check environmental conditions, and choose a location that matches your stargazing goals.
Decide What You Want to Observe
Before searching for the darkest possible place, decide what you actually want to see. Different celestial targets require different observing conditions.
The Moon, Venus, Jupiter, Saturn, and the brightest stars remain visible from many urban areas. You may only need a garden, balcony, rooftop, or nearby park with a clear view.
Faint objects are more demanding. The Milky Way, dim star clusters, galaxies, nebulae, and most meteor showers are easier to see under dark skies away from artificial lighting.
Your target also determines which part of the horizon matters most. If an astronomy app shows that an object will rise in the southeast, a location with a dark northern view but blocked southeastern horizon will not be ideal.
Planning around one or two targets makes choosing a stargazing spot much easier than simply driving into the countryside and hoping for the best.
Check the Area’s Light Pollution
Artificial light is one of the biggest obstacles to seeing faint celestial objects. Streetlights, sports facilities, shopping centers, houses, and vehicles send light into the atmosphere, where it scatters and creates a glow over populated areas.
This effect is known as skyglow. It reduces the contrast between stars and the background sky, hiding objects that would be easy to see from a darker place. Light pollution can also prevent your eyes from reess.
Understand the Bortle Scale
The Bortle scale is commonly used to describe night-sky brightness. It runs from Class 1, representing exceptionally dark skies, to Class 9, representing heavily light-polluted inner-city skies.
You do not necessarily need a Class 1 site. NASA notes that a Bortle Class 3 or 4 location can provide a great evening of stargazing for most observers. At these levels, many more stars become visible, and the Milky Way may appear under weather conditions.
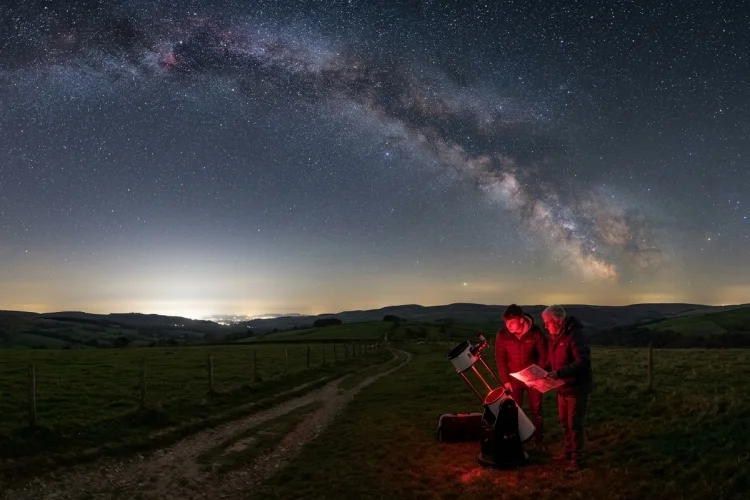
Online light-pollution maps can help you compare areas before leaving home. Look beyond the color directly above a location and examine nearby cities as well. A distant urban area can create a noticeable light dome along the horizon.
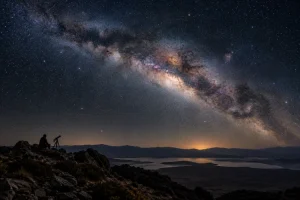
Mountains, large wilderness areas, and bodies of water may help separate an observing site from major light sources. Sometimes driving to the darker side of a city is more effective than simply traveling the same distance in another direction.
Consider the Moon Phase and Moonrise Time
Even a remote location can have a bright sky when the Moon is close to full. Moonlight spreads across the atmosphere and hides faint stars in much the same way as artificial skyglow.
For viewing the Milky Way, meteor showers, nebulae, and other faint objects, schedule your session near the new Moon. Another option is to observe after the Moon has set or before it rises.
NASA recommends checking both the lunar phase and the local times of moonrise and moonset. During the period around a full Moon, its brightness can make subtch harder to detect.
However, a bright Moon is not always a problem. If your main target is the Moon itself, a location near home may be perfectly suitable.
A crescent, quarter, or gibbous Moon can offer particularly interesting telescope views. Shadows along the dividing line between lunar day and night make mountains and crater walls appear more dramatic.
Study the Weather, Air, and## Study the Weather, Air, Visibility
A dark location is useless when it is covered by clouds. Check the hourly forecast instead of relying only on a general daily weather symbol, as conditions may change significantly after sunset.
Cloud cover is the first factor to examine, but it is not the only one. Smoke, dust, haze, moisture, and air pollution can scatter light and reduce the clarity of the sky. The National Park Service notes that atmospheric moisture and aerosols g and make nearby light domes appear brighter.
Humidity also affects comfort and may lead to condensation on binoculars, telescope lenses, and camera equipment. NOAA explains that dew forms when the air temperature rcausing water vapor to condense into droplets.
Wind deserves attention too. Strong gusts can shake a telescope, blur photographs, and make an otherwise mild night feel much colder.
The ideal forecast usually includes limited cloud cover, good visibility, light winds, and relatively dry air. Still, conditions do not need to be perfect for casual naked-eye observing.
Look for an Open Horizon and Stable Ground
A dark forest may sound like a perfect stargazing destination, but dense trees can block most of the sky. Deep canyons and narrow valleys create similar problems.
Choose an open area such as a field, hilltop, lakeshore, beach, wide campground, or spacious parking area where nighttime access is permitted. NASA recommends finding a location with broad views or, at md view toward the objects you plan to observe.
Stable, level ground is important when using a telescope or tripod. Sand, steep slopes, loose stones, and soft mud can make equipment difficult to position.
Nearby mountains can be helpful when they block a city’s light, but they may also hide objects close to the horizon. Check the landscape against the expected position of your target before making the trip.
Higher elevations sometimes offer clearer views because observers are above some low-altitude haze, fog, and smoke. However, high sites may also be colder, windier, harder to reach, or affected by rapidly chss and safety matter more than altitude alone.
Balance Darkness With Access and Safety
The darkest point on a map is not automatically the best location. A slightly brighter site with safe parking, legal access, mobile reception, and level ground may provide a much better experience.
Visit a new location during daylight whenever possible. Look for holes, cliffs, water, unstable surfaces, low branches, wildlife risks, and safe routes back to your vehicle.
NASA advises checking that the site is safely away from roads and identifying possible hazards before darkness arrives. You should also confirm ts allowed and avoid entering private property.
Check park opening hours, gate-closing times, camping rules, and permit requirements. Some public lands allow daytime visits but restrict vehicles or visitors after sunset.
Bring suitable clothing, water, basic first-aid supplies, a charged phone, and a dim red flashlight. Tell someone where you are going, especially when visiting a remote area.
Avoid setting up directly beside a road. Passing headlights can ruin your dark adaptation, while uneven roadside areas may expose you and your equipment to unnecessary danger.
Use Dark-Sky Directories and Local Resources
You do not need to discover every location yourself. DarkSky International maintains a directory of certified Dark Sky Parks, Sanctuaries, Reserves, Communities, and Urban Night Sky Places.
Certified locations use responsible outdoor lighting and provide a quality nighttime experience. Urban Night Sky Places can for people who cannot travel far from a city.
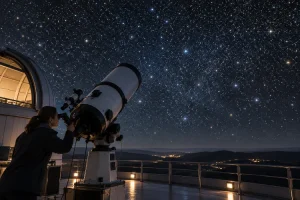
National parks, observatories, science centers, and astronomy clubs may also organize public observing sessions. Some programsess and guidance from experienced skywatchers.
Local astronomy groups are valuable because their members already know which nearby fields, parks, beaches, and viewing areas have good horizons and reliable access. They may also know about seasonal weather patterns that do not appear on a light-pollution map.
Before traveling to a famous location, contact the park or site manager. Ask about operating hours, road conditions, designated observing zones, toilets, parking, camping, and nighttime restrictions.
Test and Compare Potential Locations
A map provides a useful estimate, but the best way to judge a site is to visit it. Conditions can vary because of temporary construction lights, traffic, smoke, nearby buildings, and seasonal weather.
Allow your eyes around 20 to 30 minutes to adjust to the darkness. Keep phone screens dim and use a red-light mode when checking a chart.
Look toward each horizon and note any light domes. Count how many stars you can see in a familiar constellation, and check whether the Milky Way is visible when it should be above the horizon.
Keep a short observing journal with the location, date, Moon phase, cloud cover, visibility, and objects you found.
After several trips, you may discover that a convenient Bortle Class 4 site produces better results than a darker but windy and difficult location.
The best stargazing location is not always the place with the lowest light-pollution number. It is the location where darkness, clear skies, access, comfort, and safety work together.
Finding the best stargazing location begins with knowing what you want to observe. Bright planets and the Moon can be enjoyed close to home, while the Milky Way and faint deep-sky objects usually require darker surroundings.
Use light-pollution maps, the Bortle scale, Moon information, and hourly weather forecasts to compare possible sites. Look for an open horizon, stable ground, legal nighttime access, and a safe route home.
Whenever possible, inspect unfamiliar locations during daylight. Start by testing two or three accessible places near you rather than chasing the darkest point on a distant map.
Record what you see, compare the conditions, and gradually build a personal list of reliable observing spots for future nights under the stars.